How to Disassemble Furniture When Moving?

dissembling-furniture

We’ve all been there. You’re getting ready for the big move, and everything seems under control—until you get to the bulky furniture. That solid oak dining table you love? Doesn’t fit through the door. The IKEA wardrobe? Wobbles with every step. Suddenly, what seemed like a straightforward job turns into a logistical puzzle.

The solution? Disassemble your furniture before moving.

Not only does this make the items easier to transport, but it also protects them from damage, keeps your movers happy, and makes the entire moving day less stressful. Just like packing fragile items requires care and planning, breaking down large furniture the right way can save you a world of trouble.

In this guide by your favourite local Melbourne removalists, we’re going to break down—literally—how to disassemble your furniture for a move the smart way. Whether you’re relocating across town or interstate, this step-by-step blog will save you time, prevent costly damage, and ensure nothing is left behind.

Why Disassembling Furniture Is Worth It?

Let’s start with the “why.” After all, disassembling furniture takes time and effort. So, is it really worth it?

Yes, and here’s why:

  • Better space optimisation: Dismantled furniture takes up less space in the moving truck.
  • Reduced risk of damage: Smaller parts are easier to wrap and protect.
  • Easier maneuvering: Tight corners and staircases become less of an obstacle.
  • Saves money: You may need fewer movers or a smaller truck.
  • Safer move: Prevents injuries from trying to move heavy, awkward items.

What Furniture Should You Disassemble?

You don’t need to take apart everything. Here’s a general rule of thumb:

Disassemble:

  • Beds (frames, slats, headboards)
  • Large dining tables
  • Modular sofas
  • Bookcases with detachable shelves
  • Desks with legs that stick out
  • Wardrobes or cupboards

Leave as is (unless necessary):

  • Lightweight chairs
  • Side tables
  • Small coffee tables
  • Flat-packed items that won’t survive reassembly

Step-by-Step: How to Disassemble Furniture When Moving

1. Create a Disassembly Plan

Disassembly Plan

Before you start unscrewing bolts, take a step back.

  • Make a list of what needs to be dismantled.
  • Take measurements to ensure what can and can’t fit through doors or hallways.
  • Plan what tools you’ll need (more on that below).
  • Allocate time—you don’t want to be rushing this an hour before the movers arrive!

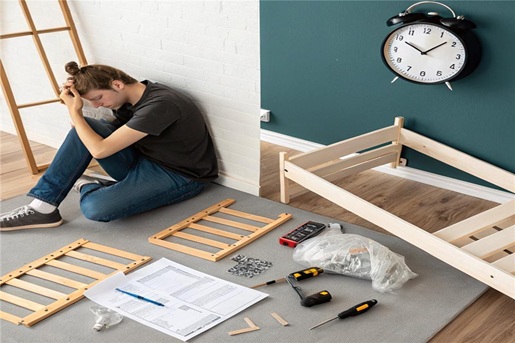
Start disassembling 2–3 days before the move, beginning with items you use least.

 
2. Gather the Right Tools

Gather Right Tools

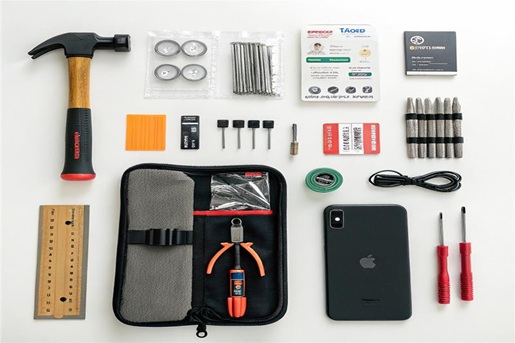
The right tools make the job smoother and safer. Here’s your disassembly toolkit:

  • Phillips and flathead screwdrivers
  • Allen (hex) keys
  • Adjustable wrench
  • Hammer or mallet
  • Ziplock bags for screws and bolts
  • Moving blankets or old towels
  • Packing tape and markers
  • Rubber bands or cable ties
  • Camera or smartphone (yes, seriously!)

Having everything on hand avoids that frustrating “where’s the Allen key?!” moment mid-task.


3. Photograph Everything First

Photograph Everything First

Before removing even a single bolt, take photos of each item.

Why?

  • Helps you remember how it fits together
  • Useful for rebuilding on the other side
  • You can reference screw placements, leg positions, or tricky joints

Think of it as your visual manual—especially helpful for furniture without original instructions.


4. Remove Loose or Fragile Parts First

Fragile Parts First

Start by removing shelves, drawers, cushions, or glass panels. This prevents them from breaking during the main disassembly.

  • Label drawers or shelves with painter’s tape (“Top Left”, “Bottom Right”)
  • Wrap glass or delicate parts in bubble wrap or thick blankets
  • Keep screws or connectors from these parts in separate zip bags

Warning: Never leave glass parts attached to furniture while moving—it’s a recipe for disaster.


5. Take Apart Major Sections

Take Apart Major Sections

Now, let’s get into the real dismantling. Tackle one item at a time. Don’t try to disassemble multiple things simultaneously—it’ll get confusing quickly.

Here’s how to approach the big stuff:

Beds:

  • Remove the mattress and slats
  • Unscrew the headboard and footboard
  • If it’s a metal frame, label which bolts go where
  • Use bubble wrap for wooden parts to prevent scratches

Dining Tables:

  • Flip it gently onto a soft surface
  • Remove legs (usually attached with bolts or screws)
  • If leaves or extensions are removable, take them out and label

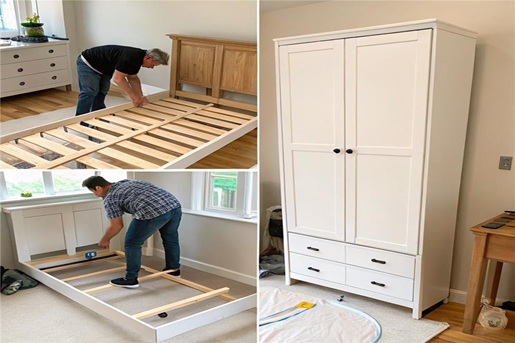
Desks and Wardrobes:

  • Remove drawers or doors first
  • Unscrew or unclip internal parts like shelves
  • Separate top and bottom if it’s a modular unit

Be careful with antique or solid wood furniture. These may not be designed to come apart easily and can crack under force.


6. Label Everything (Trust Us!)

Every part. Every screw. Every panel. Label them all.

Use painter’s tape or sticky notes to mark:

  • “Left leg – dining table”
  • “Headboard bolts – Master Bed”
  • “Drawer rails – Study Desk”

Put all small hardware into labelled ziplock bags and tape the bags to the corresponding furniture item or store them all in one “hardware box.”


7. Wrap and Protect Each Component

Wrap and Protect Each Component

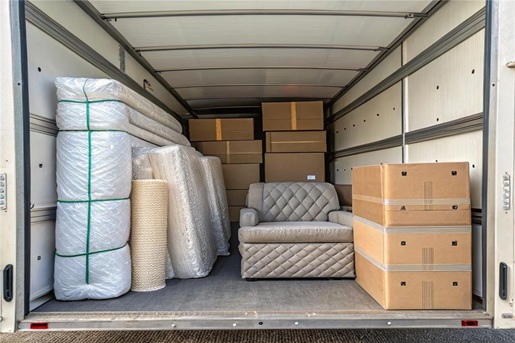
Now that you’ve got all parts separated and labelled, wrap them properly:

  • Use bubble wrap or moving blankets for panels, legs, and tabletops
  • Protect corners with cardboard or corner pads
  • Stack parts vertically (if possible) in the truck to avoid pressure damage

For upholstered furniture, plastic wrap keeps dust and stains away during transit.


8. Keep Tools Handy on Moving Day

When the big day arrives, make sure:

  • Your tools are easily accessible
  • You haven’t packed away instruction manuals (if you have them)
  • The hardware box or zip bags are kept with your essentials

You’ll thank yourself later when you’re reassembling your bed at 9 PM and don’t need to dig through 15 boxes to find a screwdriver.


9. Reassembling at Your New Home

Reassembling at Your New Home

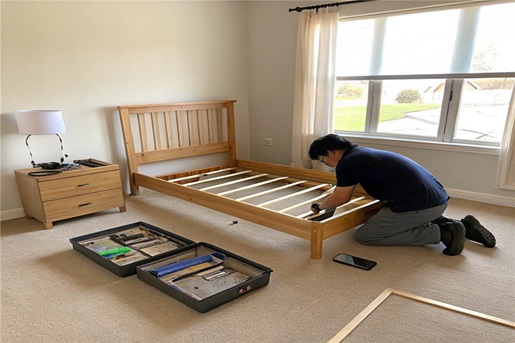
Once you arrive, take it slow. Use the photos you took earlier and follow your labels.

  • Start with essential furniture like beds or work desks
  • Avoid rushing and forcing parts back together—especially if things shifted during the move
  • Check for any missing parts before reassembling fully

If you keep everything organised, this step should be stress-free.

Should You Hire a Professional Instead?

Should You Hire a Professional Instead

If you’re dealing with expensive, vintage, or unusually complex furniture, consider hiring professional furniture movers who offer disassembly services. They’ve done this hundreds of times and come with the tools, experience, and patience needed.

Also, if you’re short on time or physically unable to handle it, it’s a stress you don’t need to take on.

Final Thoughts: Work Smarter, Not Harder

Disassembling furniture when moving might sound daunting at first—but with the right tools, plan, and a bit of patience, it becomes a smooth and satisfying process.

Remember, the key is preparation. Start early, label everything, and don’t cut corners when it comes to wrapping and protecting parts. This not only ensures your furniture arrives safely, but it also helps you reassemble with confidence at your new home.

Ready to tackle your move like a pro? Your furniture is.

writer's bio

Alice

Alice, an ace content strategist and writer with years of experience crafting compelling narratives across diverse industries, excels at turning complex topics into engaging, easy-to-understand content. Known for her knack for blending storytelling with strategic insight. Alice creates blogs, articles, and press releases that not only inform but also resonate with readers. Her dedication to understanding industry trends and audience needs ensures every piece he writes delivers value, clarity, and impact. Whether it’s simplifying gold trading insights, curating coffee shop strategies, or championing local businesses, Alice’s words leave a lasting impression.